Thursday, June 21, 2012

Gluten-Free Multi-Grain Miracle Bread


One of my sisters has Celiac Disease.  This means that she is very negatively affected if she ingests any gluten.  I made this bread for her when she came to visit a few years ago and she loved it.  It's super-easy and doesn't require any kneading.  I passed the recipe along to her and she enjoys it when she can.

Every so often, she sends me a frantic plea for help, "I lost the recipe!  Please send it to me again!"  I will also have the occasional family member ask to have the recipe so they can make bread when my sis is around.   So...

In order that all family can have the recipe if they need it, and in order that my sister will always be able to find it, here is my Gluten Free Multi-Grain Miracle Bread recipe, which I found somewhere on one of the gazillion websites out there.


Gluten-Free Multi-Grain Miracle Bread

1/2 cup brown rice flour
1/2 cup sorghum flour
1/4 cup amaranth flour
1/4 cup tapioca starch
1/4 cup cornstarch or arrowroot starch
1/4 cup flax seed meal (ground flax seeds)
3 teaspoons xanthan gum
2 teaspoons active dry yeast
1 teaspoon salt
2 eggs
2 additional egg whites
1 cup water, room temperature
2 tablespoons vegetable oil
2 tablespoons honey
2 teaspoons apple cider vinegar

Preheat the oven to 200F.

Sift the flours, yeast and all other dry ingredients together into a medium bowl. Stir in flax meal and combine.

Combine the wet ingredients in a separate large bowl using a hand-mixer on low or medium speed. When fully combined, slowly add dry ingredient mixture and mix until fully blended, with no lumps. Scrape the sides regularly.

Grease a 9x5" bread pan, and pour the dough into the pan. Turn off the oven and immediately place the pan in it. Do not open the door again, if possible. Allow the dough to rise for 90 minutes. It should rise to the very top of the pan.
Let it rise, uncovered, for 90 minutes.

Increase heat to 350F and bake for approximately 40 minutes. The crust should be golden-brown. Allow to cool slightly before removing it from the pan to finish cooling. Do not slice until the bread is no longer hot.

A nice, crunchy multi-grain bread.
This loaf does not need to be frozen, but if there are leftovers after a few days, place slices in airtight bags and freeze.

Tuesday, June 19, 2012

Sew Much Fun!


My super-mom friend and home-schooler extra-ordinaire, Momo, came over the other day to catch up.  It had been a while.  Since my ??th birthday was the day before, she surprised me with a lovely gift - a hand bag, sewn entirely by herself.  I immediately fell in love with it and then commissioned her nine-year-old daughter to make a cell-phone case to match.

Later that day, as I showed my new bag to my eight-year-old daughter, she asked if we could sew something like that too.  "Why not?"  So we jumped head first into the fun of sewing!  It's been just under a month, but we already have several crafts, made by our hands, and we're working on a few more. 

I thought this bookmark would be great for each of the kids to make for their teachers as an "end of the school year" gift.

An Apple Ribbon Bookmark

And we're taking our fun with us to Family Camp this year.  So far we've got T-shirt pillows, felt designs and Puppy Pals planned for activity time at camp with all our friends.  It'll be Sew Much Fun!
Her first project, a puppy pal!

Cut-out felt flowers attached to a hair elastic.
I haven't worn this shirt since college chorus days. 
I didn't want to get rid of it, but didn't know what to do with it. 
Voila!  A T-shirt pillow!


Are you Sew Crafty?  What were your beginner sewing projects and what are you working on now?  I'd love some tips on where to go from here!

Saturday, December 17, 2011

Graham Cracker Houses

This isn't entirely from scratch, but it beats buying expensive gingerbread houses.  I may still try to make a gingerbread houses from scratch, but I haven't had time to figure it out yet.  In the meantime, here's our family's attempt at making our own graham cracker houses.  I used leftover buttercream icing made from this recipe:

1/2 cup shortening
1/2 cup softened butter
4 cups icing sugar
2 tbsp milk
1 tsp vanilla*
*I used the scrapings of one vanilla bean.

Mix well.  Add milk if needed until desired consistency.

(As you browse through the pictures, try to guess where the engineer is.  It shouldn't be too hard.)


Tuesday, December 13, 2011

Review: Green Grandma's Vinegar Fridays

(While this post is not about a specific recipe, it is about doing so much from scratch, with vinegar.  And you just might learn something!)


I've tried to write this review a few times and either decided against it until I'd tried a few more vinegary ideas or got distracted while following through on these tips. So here I am, finally sitting down with my computer, to share with you something that has kept me busy for the last few days.

I was sent the book “Green Grandma'sVinegar Fridays” by Hana Haatainen Caye to review for my blog. I am a fan of Green Grandma's green living/family care blog and was looking forward to reading all her vinegar tips in one compact book. The book itself is a very quick read. Hana condenses a lifetime's worth of tips into 72 pages. Each of the 19 chapters is just a few pages long, so it's quite easy to breeze through them. Hana's personality comes through as well, making me giggle at times. I've never met her in real life, but I feel like I know her from reading her blog, and her book feels just the same. She introduces us to her family in this book and tells how these tips have helped her whole family, right on down to her grand-kids. (Just an FYI: I just can't follow protocol and refer to the author by her last name in this review. It seems too impersonal for such a book.)

Now for the meat of the book... I started reading a little too late on a Thursday night, so I only made it to Chapter 8 before turning out my light. The next morning I had a house to clean with my company, The Cleaner Sweep. (For those that are not familiar with The Cleaner Sweep, we clean houses using natural, toxin-free cleaning products.) I found myself thinking about all the tips I had read the night before, chastising myself for not bringing a gallon of vinegar along with me. At one point, I couldn't control myself any longer and mentioned to the client (who obviously enjoys toxin-free cleaning) that she could clean her jacuzzi with vinegar. She smiled and said she was already doing that.

After finishing the book later that day, I found myself very satisfied with the wealth of information and personal experience available to me through this book. And it's not just the book, but the accessibility of the author. Hana really cares about her readers and can be found on Facebook each day, interacting with other green folks. She's created a very nice community that goes beyond her book.

But back to the book... I found tips in here for everything! I was so excited to go to my local grocery store and buy some Apple Cider Vinegar (ACV), raw and organic of course since all those good enzymes are still in there. It's supposed to be great for your body (weight/fat loss, colds, digestion, cramps, heartburn, hot flashes, insomnia, and the list goes on) when taken daily. I've already had an ACV tea party with my daughter and we're planning many more.

(Recipe alert:   Mix 1 tbsp honey with 2 tbsp ACV and 1 cup hot water.  Repeat in a separate mug if you are planning to share with a friend.  Enjoy your ACV tea party!)

There are so many tips in this book for cleaning your house.  You can clean virtually anything with Distilled White Vinegar (DWV)! The first tip I tried was to clean my shower-head with a rag soaked in vinegar. I left it on for a couple hours while I was busy in another part of the house and when I came back and gave a quick swipe all the gunk was gone. I'm guessing that was about 35 years of gunk since I've never been able to get it that clean before and that's how long this house has been accumulating gunk.

I've cleaned my coffee maker and dishwasher with vinegar, with great results. I deodorized and fabric-softened a load of sheets (that got anointed by my young son through the night) with vinegar. I've cleaned my drains with it and removed longstanding cat odours from carpet with it. I have yet to try the other cleaning tips but she suggests vinegar for windows, walls, fridges, stoves, microwaves, carpet stains and so on.

There was one thing that I tried that I'm just not sure about. There are quite a few “no'poo”ers out there who are shampoo-free and only using baking soda and vinegar to clean their hair. I tried it for one day and then gave up, so I'm not a very good person to give a review on this part of vinegar. But I'm planning to try again. I'll ease my way into it and research it a little more to find out what will work best for my hair type and water type before I try again.

There were a few things that I would have enjoyed seeing in the book. I would love to have a little more of the scientific, nitty-gritty details of why these suggestions work, perhaps studies and research to show that vinegar really does improve your health or to understand why it eliminates odours. In lieu of that though, I am glad to have someone else's trust-worthy testimony telling me that these ideas really do work. (And Green Grandma is quite trustworthy. Anyone who has spent time reading her blog and following her on Facebook knows that she'll tell you if something just isn't cutting it.)

I would also have loved to see an index in the book. This kind of book is great to have around since it has helpful hints for so many different things and an index would have made these tips all the more accessible. Perhaps Hana can include an index in a revised edition five years from now. (Inside joke. You had to read the book.) In the meantime, pick up a copy if you can. The price tag may seem a little steep for such a small (but mighty) book, but it's so worth it since you will save that much money in one month if you make just a few changes around your house using these vinegar tips.


You can purchase Green Grandma's Vinegar Fridays here.
You can visit Green Grandma at her blog or on her Facebook page (or both!)

Monday, December 12, 2011

Lemon Squares

This is one of my mom's more recent recipes.  I love tart, lemony flavours, so this one got added to my Christmas list pretty quickly.


The Cast
1 cup flour
1/4 cup white sugar
1 /2 unsalted butter, softened

1/3 cup seedless raspberry jam

2 eggs. beaten
1 pkg Shirriff lemon pie filling
1/2 cup ground almonds

1/4 cup sliced almonds

Preheat oven to 350 F.
Mix softened butter and sugar, then add flour until it all holds together.
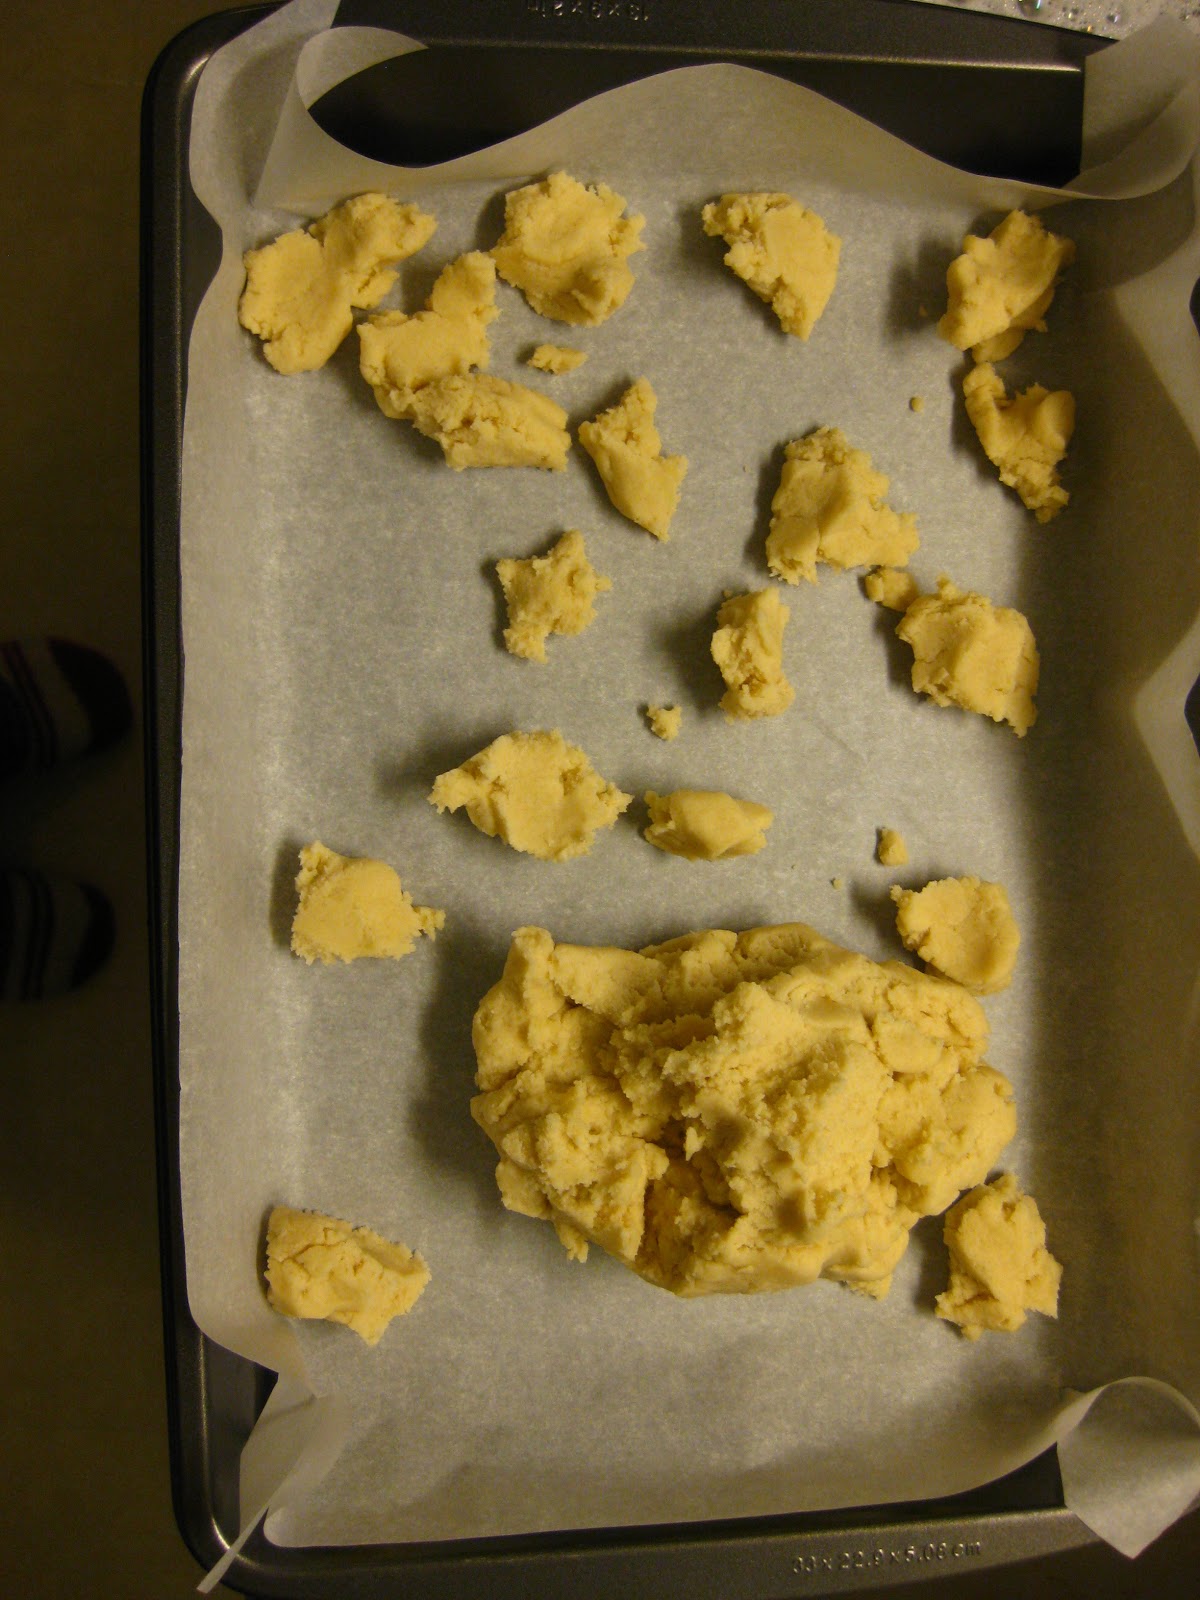
 Plop blobs of dough into a parchment lined 8x8 pan until even dispersed. (My pics are of 9x13 pans, but rest assured that the recipe I have here works best for 8x8 pans.  When you have to make 210 Lemon Bars, you figure out how to make it in the biggest pan possible.)
With your finger tips, press the dough down until it is evenly covering the pan.
 Bake at 350 F for 15 minutes until just browning on the edges.  Allow it to cool for a few minutes, then spread jam evenly over the shortbread crust.

 Set pan aside.  Beat eggs (you'll need two...  You're working with an 8x8 pan, remember?) until they have some air incorporated into them.

 Mix in ground almonds and Shirriff lemon pie filling until combined.
 Pour over the shortbread and jam.
 Sprinkle with sliced almonds.  Bake again at 350 F for 20-25 minutes until set and firm to the touch.
Allow these to completely cool before cutting them.  Cut into 25 squares (or 16 if you're feeling indulgent) and enjoy!

Thursday, December 8, 2011

Chocolate Mint Brownies

I have something to confess:  The other night as I was making these...
... I had a little hissy fit and declared that I would never make them again.  (My hissy fit may have been fueled by my intolerance of whiny kids paired with my overabundance of whiney kids.)  And then I had a spoonful of chocolate mint goo.  And everything was better.  Rest assured, Dear Husband That Likes To Eat The Leftover Goo When I Cut These, I will make these again.

The players:

Brownie Layer
3/4 cup butter
6 oz unsweetened chocolate
1 2/3 cup sugar
1 1/2 tsp vanilla
3 eggs
3/4 cups flour
1/4 tsp salt

Mint Layer
3 tbsp butter
1 1/2 powdered sugar
2 tbsp heavy cream
3/4 tsp mint extract
green food colouring

Chocolate Glaze
4.5 oz high quality semi-sweet chocolate
2 tbsp unsalted butter

Preheat your oven to 325 F.  Line a 9x13 pan with parchment paper.

Brownies:  Melt butter and unsweetened chocolate in a double boiler. (If you don't know what that is, just wait, you'll see a picture of it a little further down.)

 Remove from heat and stir in the sugar and vanilla.

 Add the eggs, one at a time.  Beat well with a wooden spoon after each addition.

 Stir in the flour and salt and beat until smooth, about one minute.  Pour into the parchment-lined 9x13 pan.  Bake for 25 minutes.
 Once the brownies come out, let them cool.  Take a bath, read a book, have a coffee.  Make some lasagna for dinner.  Once the brownies are room temperature, make the mint frosting as follows:
Beat all ingredients (butter, sugar, cream, mint, green colouring) until smooth. 
 If you think the frosting is too thick to spread, add a few drops of cream.  It should be spreadable, not pourable.
 Spread the mint frosting evenly over the brownie layer.  Allow to set.
 It may take half an hour or so for your mint layer to set.  You want it to have a little crust over it so the next layer doesn't mix with it.  You've got half an hour or so, so pick up the phone and call your best friend/mom/sister.  She'd love to hear from you.

Once it's got a nice crust over it, it's time to make the chocolate topping.  In a double boiler (here's the picture, just for you!) melt the semi-sweet chocolate* with the butter.  Spread over the mint layer.  Allow to cool fully before cutting.  The chocolate layer should start to dull somewhat.

 *I used Chipits chocolate chips, but have determined that they are too finicky.  I'll now only use Belgian semi-sweet chocolate for this stage.

 I cut my 9x13 pans into 40 pieces (8x5 pieces.)  I have to cut these like I cut cheesecake.  Cut once, scrape knife, cut again, scrape knife.  This is where the ooey-gooey bits come in.  My husband loves when I make these because he gets to eat all the castoff icing bits.

And voila!  Chocolate Mint Brownies! 

Tuesday, December 6, 2011

Almond Toffee Bars

Several years ago I went to a local food festival and got a front row seat to see our local celebrity chef, Anna Olson.  She was showing us how to make sweets that are sold at her local shop.  The one that I tasted and (fell in love with) was an almond toffee bar.  I don't even know what she calls them.  I call them Divine, as this combination of flavours could only have come from God himself.  The recipe itself is so simple.  I cannot find the recipe anywhere online, so I've had to kind of make up my own based on what I remembered seeing her do.

Anna Olson's Almond Toffee Bar

1 1/2 cups rolled oats
1/2 cup graham crumbs
3 tbsp butter, melted

1 cup Skor or Heath bits
1 cup semi-sweet chocolate chips
1 cup sliced almonds
1 tin  sweetened condensed milk

Preheat oven to 350 F.

Line a 9x9 pan with parchment paper.  Mix oats, graham crumbs and butter and pat into bottom of the pan.  Layer the rest of the ingredients in the order they are given.  Bake for 25 minutes or until almonds have started turning light brown.  Allow to cool completely and then cut and serve.

Makes 25 squares (unless you like to indulge, in which case you can cut into 16 squares).


 (You may need to make a few recipes of this...  They are a crowd favourite, so they don't stick around too long.  Even folks that don't enjoy nuts like these.)